How to edit audio files with GEAR 7.0 GEAR 7.0 includes a built-in audio editor, capable of editing WAV, MP3, OGG, WMA, or MPA files. There are a number of ways you can use this editor to adjust or fix your audio tracks. To access the audio editor, choose "Audio Editor" from the Tools menu.  Choose the audio file you wish to open. The Audio Editor opens the file... 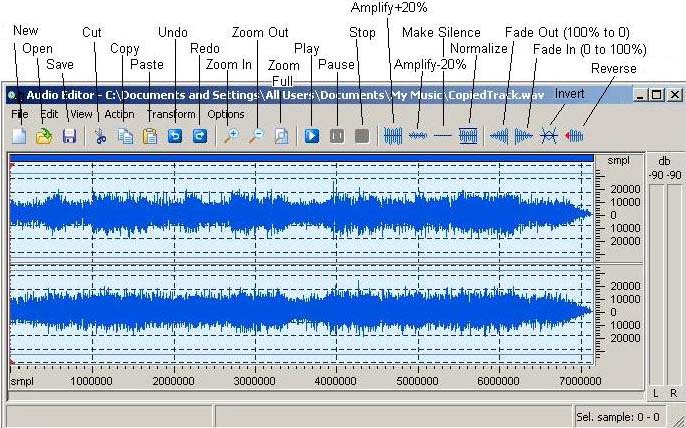 The audio editor is like a program within GEAR. You can use the editor to open, play, edit, and save audio files. If you plan to edit the audio file, we recommend that you first use the "Save As" command to save a copy of the original file under a different name, or in a different directory. In this way, you will still have a copy of the original audio file, in case you aren't happy with the changes you made. The two channels (left and right) of digital audio are displayed in dark blue. The horizontal axis represents time, shown in samples. There are 44,100 samples per second for CD-Audio. Your audio file may be encoded with a different sampling frequency, so there may be more or less samples per second. You can place the position marker at any point within the audio track by clicking in the blue area. If you click near the top of the left channel (above the grey line), or near the bottom of the right channel, you will see the curser change to an arrow with an "L" or an "R". In this area you can select only the left or right channel. You can select a portion of audio by dragging from the desired start point to the desired end point. 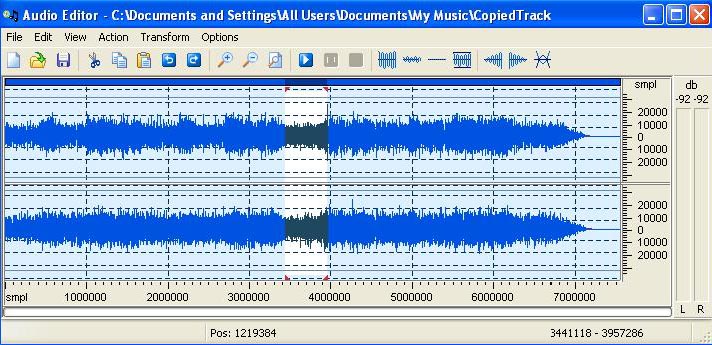 After selecting a portion of audio, you can zoom in by pressing the zoom in button Once you are zoomed in on a portion of the audio file, you can scroll left or right by dragging the small rectangle in the center of the thin blue line above the audio waverforms (below the toolbar). This will not change the selection, but it will let you view areas outside of the current window. You can play the audio from this position by pressing the play button To cut a portion of audio, simply select the audio, then press the cut button You can normalize the volume in a section of audio by choosing the "Normalize" command from the Transform menu. This will make the volume level more consistent throughout the selected area, making quieter sections louder, and louder sections quieter. As you can see, GEAR's software products make it easy to edit your WAV, MP3, WMA, OGG, or MPA audio files. |